

Enhancing the performance of a sports car goes beyond just modifications under the hood; it also involves closely monitoring the engine’s behavior with accurate gauges. These instruments are essential for any car enthusiast looking to maximize the potential of their vehicle. Performance gauges provide critical real-time data, including boost levels, temperature readings, and RPM information, allowing drivers to make informed decisions about their driving and tuning practices.
One of the most significant metrics to track in a turbocharged sports car is the boost pressure. Properly functioning boost levels can lead to improved acceleration and overall engine efficiency. Installing a boost gauge enables drivers to visualize how well their engine is operating under varying conditions, helping them to avoid detrimental situations that may lead to engine failure or inefficient performance.
In this article, we will explore the various types of performance gauges available for sports cars, the installation process, and best practices for monitoring your vehicle’s performance. Whether you’re an experienced racer or a newcomer looking to enhance your ride, understanding how to effectively utilize gauges can dramatically improve your driving experience.
Choosing the Right Boost Meter for Your Vehicle
Selecting an appropriate boost meter is crucial for optimizing the performance of your sports car. A boost meter, or boost gauge, provides real-time information about the pressure generated by the turbocharger or supercharger, helping you make informed adjustments to enhance engine efficiency and power delivery.
Here are some key factors to consider when choosing the right boost meter:
- Type of Boost Meter:
- Analog Boost Gauges: Traditional mechanical gauges that use a needle to indicate pressure levels. They are often preferred for their simplicity and reliability.
- Digital Boost Gauges: Offer precise readings and often feature programmable settings. They may display additional information such as peak boost levels.
- Pressure Range: Choose a meter that accurately reflects the expected boost levels of your vehicle. Standard ranges are typically from 0 to 30 psi, but higher-performance applications might require up to 50 psi or more.
- Compatibility: Ensure the boost meter is compatible with your vehicle’s make and model. Check for adapter kits if needed.
- Mounting Options: Assess where you want to install the meter. Options include pillar mounts, dash mounts, or dashboard pods. Choose a style that fits your aesthetic and provides clear visibility.
- Backlighting: Look for gauges with adjustable backlighting to ensure readability during day and night driving conditions.
- Brands and Reviews: Research reputable brands in the aftermarket gauge industry. Consider customer reviews for reliability and accuracy.
By taking these factors into account, you can select a boost meter that not only suits your vehicle’s specifications but also your personal preferences for performance monitoring.
Tools Required for Gauge Installation in Sports Cars
Installing performance gauges in sports cars requires specific tools to ensure precise measurements and a professional finish. The primary tool needed is a quality socket set, which allows for the efficient removal and installation of bolts securing the gauge panel and associated components.
A multimeter is essential for any electrical connections, enabling the mechanic to test voltage and continuity. This ensures that the gauges receive proper power and function effectively. When working with boost gauges, particularly those that require a vacuum source, a vacuum pump may be necessary to verify the integrity of the system.
Additionally, an appropriate set of wire strippers and connectors will assist in making secure and reliable electrical connections. This is crucial for gauges that provide data on performance metrics, as proper connectivity directly affects gauge accuracy.
For those installing mechanical gauges, a specific set of tubing and fittings is required to connect the gauge to the vehicle’s boost source. This ensures that the gauge receives accurate readings of boost levels during performance. Teflon tape will also be useful to prevent leaks at the connection points.
Lastly, a digital or analog torque wrench is beneficial for applying the correct amount of torque to bolts, especially when securing parts that hold the gauges in place. Ensuring that components are tightened to manufacturers’ specifications is key to maintaining safety and performance.
Step-by-Step Guide to Installing a Boost Meter
Installing a boost meter in your sports car is an excellent way to monitor the performance of your engine, particularly if you have made modifications to increase turbocharger efficiency. Follow this step-by-step guide for a seamless installation process.
Step 1: Gather Necessary Tools and Materials
Before starting the installation, ensure you have all necessary tools on hand. Typical tools include a socket set, screwdrivers, drill with bits, and a wiring kit. Additionally, procure the boost meter, vacuum hose, and any required mounting brackets.
Step 2: Choose the Appropriate Location
Determine the best location for the boost meter. Common choices include the dashboard or A-pillar. Ensure the spot provides clear visibility without obstructing your view while driving.
Step 3: Disconnect the Battery
Safety is paramount. Disconnect the negative terminal from your car’s battery to prevent any electrical mishaps during installation.
Step 4: Prepare the Vacuum Line
Identify the intake manifold and locate a suitable vacuum source. Use a drill to create a small hole, ensuring it is positioned away from moving parts. Connect the vacuum hose from the boost meter to this source, securing it tightly to prevent leaks.
Step 5: Mount the Boost Meter
Using the mounting brackets, secure the boost meter in the chosen location. Follow the manufacturer’s guidelines for optimal positioning, ensuring it is level and securely fastened.
Step 6: Run Electrical Wiring
Route the electrical wiring from the boost meter to the vehicle’s fuse box or power source. Make certain to connect the power wire to an ignition source so the meter operates only when the engine is on. Use a multimeter to verify correct voltage before final connections.
Step 7: Reconnect the Battery
Once all connections are secured and tested, reconnect the negative terminal of the battery. This will power up the boost meter for testing.
Step 8: Test the Boost Meter
Start your engine and check the functionality of the boost meter. Ensure that it responds accurately to the engine’s boost levels. Take your vehicle for a short drive to confirm that the readings are consistent and reliable.
By following these steps carefully, you will successfully install a boost meter in your sports car, allowing you to monitor performance enhancements effectively.
Wiring Considerations for Performance Gauges
When installing performance gauges in sports cars, proper wiring is crucial for accurate readings and reliable operation. One of the primary concerns is ensuring that the wiring harness is compatible with the specific gauges being installed, particularly for boost gauges which often require specialized signal inputs.
First, it’s essential to select high-quality wiring that can withstand the harsh conditions of the engine bay. Use wires with adequate insulation and temperature ratings to prevent degradation over time. The gauge manufacturer will typically recommend wire gauge sizes, so adhere to these specifications to ensure optimal signal transfer and minimize resistance.
Next, pay attention to the grounding of the gauges. A poor ground connection can lead to inaccurate readings and erratic performance, particularly for boost gauges that rely on precise pressure readings. Establish a solid ground point close to the gauges to ensure a consistent and reliable electrical reference.
Moreover, consider implementing a dedicated power source for the gauges. This helps to isolate them from other electrical loads in the vehicle, which can introduce noise and affect performance. Utilizing a relay can also protect the gauge circuits from voltage spikes and other electrical anomalies.
Additionally, when routing the wires, avoid running them parallel to high-voltage wires, such as ignition or power cables, which can induce electrical noise. Instead, keep gauge wiring as far away from these sources as possible to ensure accurate readings and reliable gauge function.
Finally, conduct a thorough testing phase post-installation. Check all connections for stability, and ensure that the gauges respond correctly under various driving conditions. Properly addressed wiring considerations will greatly enhance the performance and reliability of the installed gauges.
Calibrating Your Boost Meter for Accuracy
Proper calibration of your boost meter is crucial for achieving accurate performance readings in your sports car. An incorrectly calibrated meter can lead to misinformed tuning decisions and potentially harm your engine. Follow these steps to ensure your boost meter is functioning accurately.
The first step in calibration is to set up your boost meter correctly. Make sure the mounting location allows for unobstructed airflow and is free from vibrations. A common method is to install the meter in the cabin, using proper tubing to connect it to the intake manifold. Ensure all connections are airtight to avoid leaks, which can skew measurements.
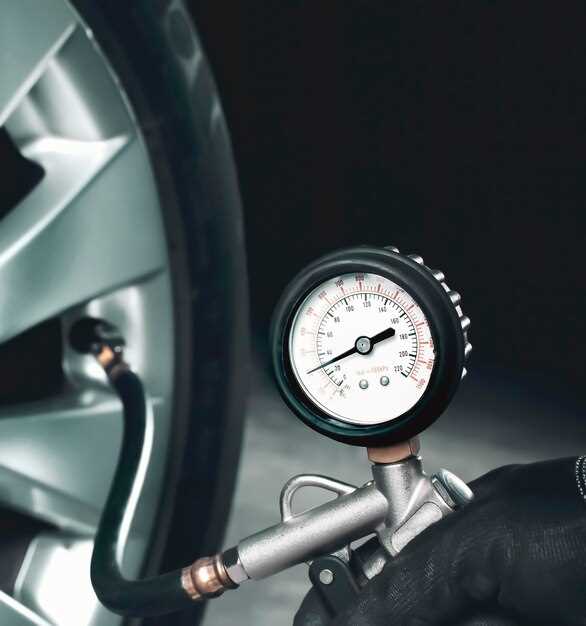
Next, it’s important to compare the readings from your boost meter against a known reference. Many performance enthusiasts use a handheld gauge as a benchmark. To perform this comparison:
| Step | Action |
|---|---|
| 1 | Start your engine and allow it to reach operating temperature. |
| 2 | Rev the engine under load to create boost pressure. |
| 3 | Record the boost readings from both your boost meter and the handheld gauge. |
| 4 | Make note of any discrepancies between the two readings. |
If you find a difference in readings, you will need to adjust your boost meter. Calibration often involves using either a calibration screw or software settings, depending on the model. Consult the manufacturer’s manual for specific instructions relevant to your gauge. After making adjustments, repeat the verification process to ensure accuracy.
Lastly, it’s important to recalibrate your boost meter periodically or after making modifications to your engine. Significant changes to boost levels or installation of new components can affect baseline readings. Regular checks ensure you maintain optimal performance and protect your investment in your sports car.
Common Issues and Troubleshooting After Installation
After installing performance gauges in your sports car, you may encounter several common issues that could affect their functionality and accuracy. Addressing these concerns promptly can help ensure optimal performance tracking.
One of the most frequent problems is incorrect readings on the boost meter. If the gauge displays inconsistent or erratic values, check the vacuum source connected to the gauge. Ensure that all hoses are securely attached and free from leaks, as any air escape can lead to faulty measurements. Additionally, verify that the boost gauge is calibrated properly according to the manufacturer’s specifications.
Another potential issue involves electrical problems, especially in electronic meters. If the display is dim or completely unresponsive, first check the wiring and connections. Ensure that the power source is functioning and that all ground connections are secure. A faulty connection can hinder the gauge’s ability to display real-time information, leading to inaccurate performance tracking.
Sometimes, the placement of the gauges can influence their performance. If the boost meter is installed in a place where it is difficult to read or is obstructed by other components, consider relocating it to an area with better visibility. This not only improves user experience but also allows for timely adjustments based on the readings.
Calibration issues can also arise within performance gauges. If the readings seem off compared to expected performance levels, consult the user manual for recalibration procedures. It’s crucial to match the gauge with your engine setup and boost levels for reliable tracking.
Finally, if you experience fluctuations in boost readings at various RPMs, investigate the condition of your turbocharger or supercharger. Mechanical issues can affect boost levels, leading to misleading data on your meter. Regular maintenance and checks on your forced induction system can prevent these problems from affecting gauge performance.