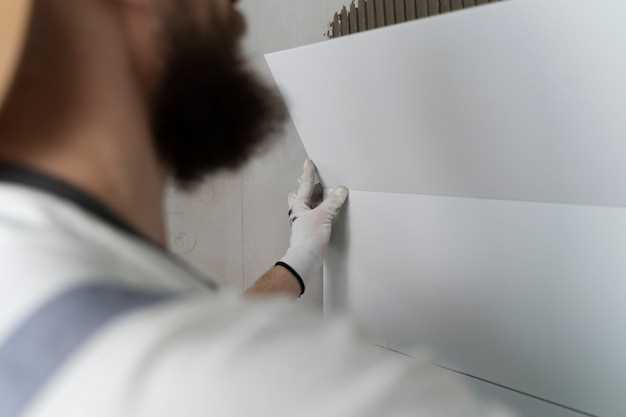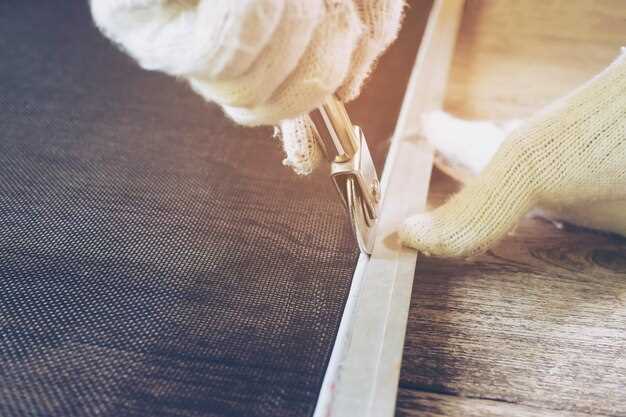
Interior trim panels are essential components of any vehicle’s aesthetic and functional design. Over time, these panels may become damaged or worn due to various factors including temperature fluctuations, regular wear and tear, or accidental impacts. When faced with such issues, it is crucial to understand the best practices for repairing these components effectively, while ensuring your safety throughout the process.
One of the first steps in addressing damage to trim panels is assessing the extent of the issue. Often, minor damages can be fixed with simple tools and techniques, whereas more significant damage may require a more detailed approach. Knowing how to pry off the trim panels safely is vital to prevent further damage during the repair. Utilizing the right tools, such as plastic trim removal tools, allows for a gentle disengagement that preserves the integrity of both the panel and the surrounding areas.
Moreover, understanding materials used in trim panels can significantly influence the repair process. Many trim pieces are made of plastic or vinyl, which require specific adhesives and fillers for effective repairs. By selecting the appropriate materials and methods, one can achieve a seamless restoration that not only looks good but also enhances the longevity of the panels. Whether you’re a car enthusiast or a first-time DIYer, mastering the art of trim repair can save you time and money, while providing satisfaction in restoring your vehicle’s interior to its former glory.
Choosing the Right Pry Tools for Trim Repair
When it comes to repairing interior trim panels, selecting the appropriate pry tools is essential for an effective and safe process. Using the wrong tools can lead to damaged panels or injury. Here are key factors to consider when choosing pry tools for trim repair:
- Material: Look for pry tools made from durable materials such as plastic or nylon. These options are less likely to cause damage to the trim compared to metal tools, which can leave scratches or dents.
- Design: Opt for tools specifically designed for trim removal. These often feature flat, angled edges that can easily slip under trim pieces without causing harm.
- Size: Consider the size of the pry tool. A set that includes various sizes can help you handle different trim types and configurations effectively.
- Grip: Choose tools that offer comfortable grips. This is important for extended usage to avoid hand fatigue and ensure precise control during repair work.
- Versatility: Some pry tools are multifunctional, allowing you to handle various tasks beyond trim repair. Investing in versatile tools can save you money and space in your toolbox.
To summarize, selecting the right pry tools for trim repair involves considering the material, design, size, grip, and versatility. By choosing wisely, you can enhance your repair process and ensure that both your trim and workspace remain intact.
Identifying Common Issues in Trim Panels
Trim panels are essential components of vehicle interiors, enhancing aesthetics while protecting underlying structures. However, they can develop various issues that require attention. Common problems include loose or detached sections, scratches, cracks, and discoloration. Recognizing these issues early can prevent further damage and costly repairs.
Loose trim panels often result from worn clips or adhesive failure. To identify this, gently pry at the edges to check for any movement. If the panel shifts or rattles when touched, it’s time for a repair. Secure the panel by replacing any broken clips or using appropriate adhesives for reattachment.
Scratches and surface blemishes are frequently seen in high-traffic areas. When examining the panels, look for visible marks that can be addressed with refinishing. Proper tools such as polish or repair kits can effectively minimize these imperfections, restoring the trim’s appearance.
Cracks are more serious and typically necessitate immediate attention. Inspect the panel closely; if you identify any fractures, it’ll be crucial to assess the surrounding area for damage. For minor cracks, specialized adhesives can be used to bond the material securely. In more severe cases, replacing the panel may be the best option to maintain integrity.
Discoloration can occur due to prolonged exposure to sunlight or harsh cleaning products. Check the panels for faded colors or uneven tones. To remedy this, consider using a color-matching dye or trim restorer, which can help to revitalize the panel’s original look.
In summary, recognizing common issues in trim panels–such as looseness, scratches, cracks, and discoloration–is vital for maintaining the vehicle’s interior. By utilizing the right tools and techniques for repair, you can ensure that your trim panels not only look good but also function correctly.
Step-by-Step Guide to Removing Trim Panels

Removing trim panels may seem daunting, but with the right approach, it can be done safely and effectively. Follow this step-by-step guide to ensure your repair process goes smoothly.
Step 1: Gather the Necessary Tools
Before you start, collect all the tools you’ll need. Typically, you will require a flathead screwdriver or a trim removal tool, a ratchet and socket set, and possibly a Phillips screwdriver. Adequate lighting is also important to see all the fasteners clearly.
Step 2: Prepare the Area
Clear the area around the trim panel. Remove any items or accessories that might obstruct your access. This includes items like floor mats, seat covers, and any covers that conceal screws or clips.
Step 3: Identify Fasteners
Inspect the trim panel carefully to locate any screws or clips holding it in place. Fasteners may be hidden behind covers, so use a flashlight to reveal all points of attachment. Use the appropriate screwdriver to remove any visible screws.
Step 4: Use a Pry Tool
Take your trim removal tool or a flathead screwdriver and gently insert it between the trim panel and the vehicle body. Apply slight pressure to pry the panel away from the body. Start at one corner and work your way around to minimize damage.
Step 5: Disconnect Wiring Harnesses
If the trim panel has electronic components, like switches or lights, carefully disconnect the wiring harnesses. Ensure not to pull on the wires themselves; instead, grip the connectors firmly and pull them apart.
Step 6: Remove the Trim Panel
Once all fasteners and wires are disconnected, continue to carefully pry the trim panel away from the surface. If resistance is encountered, check for any remaining clips or screws before applying additional force.
Step 7: Inspect for Damage
After removing the trim panel, inspect it for any damage or wear. This inspection is crucial before proceeding with repairs or reinstallation, ensuring you address any issues immediately.
By following these steps, you can safely and effectively remove trim panels for repair or replacement. Always handle components carefully to avoid unnecessary damage.
Techniques for Repairing Damaged Trim Surfaces
Repairing damaged trim surfaces requires careful attention and the right tools to achieve a seamless finish. The first step is to assess the extent of the damage. For minor scratches and dents, a simple touch-up with paint or a filler might suffice. However, for more severe problems, like cracks or breaks, more comprehensive techniques are necessary.
One effective method involves using a pry tool to carefully detach the damaged trim from its original position. It is crucial to do this gently to avoid causing further damage. Once removed, inspect the underlying surface to ensure it is intact. If the trim is cracked, a strong adhesive can be applied to bond the pieces together securely. After the adhesive has cured, sand the area to create a smooth transition between the repair and the original trim.
In cases where the damage is extensive, consider replacing the damaged section entirely. Use your tools to cut a new piece of trim to the correct dimensions. Fit it into place before securing it with adhesive or fasteners. This method not only restores the trim’s integrity but also maintains its aesthetic appeal.
For minor surface imperfections, a quality sandpaper can help smooth the affected area. Begin with a coarser grit and gradually move to a finer one to achieve a polished look. Follow up with a touch-up paint that matches the original color to conceal the repair, ensuring that the finish is consistent with the surrounding trim.
Lastly, always remember to clean the trim thoroughly before starting any repair process. This ensures that no dirt or grease interferes with the adhesion of repair materials. Proper preparation and the right techniques will help in restoring the trim surfaces effectively and safely.
Reinstalling Trim Panels Without Damage
Reinstalling trim panels requires attention to detail and proper techniques to ensure they fit correctly without incurring any damage. The right tools are essential in this process, providing both leverage and precision.
The first step is to gather the necessary tools for the job. Commonly needed tools include a trim removal tool, screwdrivers, and a soft mallet. These tools help you avoid scratching or denting the trim during the installation phase.
Before reinstalling, inspect the trim for any signs of wear or damage from the previous removal. Any damages should be repaired using appropriate methods such as adhesive, filler, or replacement parts as needed.
During the reinstalling process, follow these best practices:
| Step | Action | Tip |
|---|---|---|
| 1 | Align the trim with the mounting points | Check for clips or tabs! |
| 2 | Gently press the trim into place | Avoid using excessive force! |
| 3 | Secure trim with screws or fasteners | Tighten without over-torquing! |
| 4 | Inspect the fit and finish | Look for gaps or misalignments! |
| 5 | Clean any fingerprints or smudges | Use a soft, lint-free cloth! |
By adhering to these guidelines, trim panels can be reinstalled safely and effectively, enhancing the overall appearance and function of the interior while preventing any unnecessary damage.
Maintaining Your Trim Panels Post-Repair

Once you have completed the repair of your interior trim panels, it is essential to implement a maintenance routine to ensure their longevity and aesthetic appeal. Start by regularly inspecting the panels for any signs of wear, such as scratches, dents, or loosening edges. Addressing these issues early can prevent further damage.
Utilize appropriate tools to gently clean the trim panels. A soft microfiber cloth is ideal for dusting, while a non-abrasive cleaner can help with more stubborn stains. Avoid using harsh chemicals that may damage the finish or material of the panels.
If you notice any loose areas, do not hesitate to re-secure them using specialized fasteners or adhesives designed for automotive applications. When re-installing, take care not to pry too forcefully, as this can lead to additional damage. Using plastic prying tools can help minimize the risk of harming surrounding surfaces during adjustments.
To protect the panels from UV damage and fading, consider applying a UV protectant specifically formulated for automotive interiors. This will help maintain their color and finish over time, preserving the results of your repair efforts.
Lastly, be mindful of any items you place near or against the trim panels. Avoid sharp objects or heavy items that could cause abrasion or pressure points, which might lead to future repairs. By following these simple maintenance practices, your trim panels can remain in excellent condition, enhancing the overall look of your vehicle’s interior.
